
Disclosure: Some of the links in this article may be affiliate links. If you purchase through these links, we may earn a small commission at no extra cost to you. This helps support our lab. Read our full Disclaimer for more information.
Writing a technically sound piece of content is only half the battle. If search engines cannot crawl your page properly, your traffic flatlines.
Even worse? Hitting submit on your Google AdSense application, only to get slapped with a devastating “Low-Value Content” rejection.
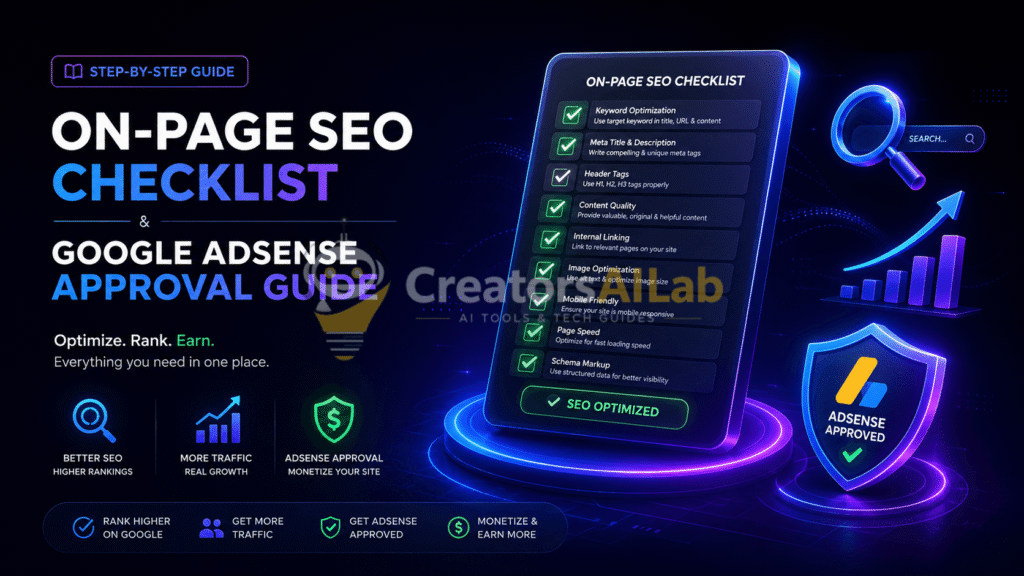
Passing the manual review doesn’t require a magic trick; it requires structural discipline. In this guide, I am handing you the exact on-page SEO checklist for AdSense that optimizes your posts for Search Console bots and human reviewers simultaneously. Let’s build a layout that actually gets approved.
What You Will Learn:
- Reviewer Mindset: Manual reviewers love neat formatting, clear headings, and zero clutter on mobile screens.
- Value First: Adding simple comparison blocks and unique tips saves your site from low-value content filters.
- Crawl Setup: Proper keyword distribution helps indexing bots scan and approve your links within hours.
Table of Contents
Understanding the Psychology of Google AdSense Reviewers
Before we talk about technical settings, you must understand who looks at your website. When you submit your application, your blog goes through quick software checks and a manual human review.
Here is the brutal truth: Human reviewers do not read every word of your text. They ruthlessly scan your layout presentation.
If your site looks like a messy personal journal or a lazy, machine-generated block of text, you get rejected instantly. Following a strict on-page SEO checklist for AdSense proves to the evaluator that your platform operates as a professional, trustworthy brand.
Craft an Actionable, Keyword-Rich Title (The H1 Tag)
Your post title is the main front door of your article. It tells search crawlers exactly what your entire page theme is about.
When creating your title, always keep these three rules in mind:
- Place Keyword Early: Keep your focus phrase near the front of the heading.
- Watch the Length: Keep it under 60 characters so Google does not cut it off on search pages.
- Make it Actionable: Use simple numbers or exciting power words to win more clicks.
Here is the catch: inside your WordPress theme settings, your main title automatically becomes your H1 tag. You must never create another H1 tag inside your post body text.
Hook Your Readers within the First 150 Words
The introduction paragraph has two huge jobs. It must convince a human reader to stay on your page, and it must give search bots a quick contextual summary.
To optimize this perfectly, drop your core on-page SEO checklist for AdSense keyword naturally within the first two lines. Agitate the exact problem your reader is dealing with, then immediately hand them the solution.
Keep your sentences short. Long, winding blocks of text in the introduction kill audience retention and spike your bounce rate immediately.
Structure Content Using a Logical Heading Hierarchy
Nobody likes reading a giant wall of unbroken text. It tires the eyes and makes your site look incredibly amateurish to a web reviewer.
Break your article down into manageable parts using Subheadings (H2, H3, and H4 tags). Think of these like chapters in a book. Let us map out a clean comparison layout of how this structure should look:
| Heading Level Tag | How to Use It Correctly | Example Setup |
| H1 Tag | Only for your main post title. | The Ultimate On-Page SEO Checklist… |
| H2 Tag | For your main subtopics or core steps. | 4. Structure Content Using Headings |
| H3 Tag | For smaller details inside an H2 topic. | Why H3 Tags Help Mobile Scanners |
Master the Art of Mobile Paragraph Formatting
Right now, a massive chunk of web traffic comes from mobile screens. Google tracks websites using strict mobile-first indexing 2026 standards. This means your blog is judged entirely on how it performs on a mobile screen, not a desktop layout.
A text block that looks short on a wide computer monitor will stretch into a giant, scary wall of text on an android smartphone screen.
Follow the simple 3-line rule. Keep your paragraphs limited to a maximum of 2 to 3 lines short. Lots of clean white space keeps the reading experience light and enjoyable.
Optimize Images for Speed and Context (Alt Text)
Adding custom photos and helpful screenshots makes your guides much more engaging. But search engine bots are completely blind to images. They cannot see colors or graphics.
Search bots are blind; they only read backend descriptions.
Before uploading any graphic, rename the raw file from generic codes to descriptive words (e.g., seo-checklist.png). Once uploaded, fill out the Alt Text box with a clear sentence explaining the photo. Finally, compress your file sizes under 100 KB using WebP formatting to maintain blazing-fast page speeds.
Build a Clean Permalink URL Architecture
Your webpage address link is called a permalink string. A long, messy URL string looks incredibly spammy and untrustworthy.
- Bad URL Structure:
[creatorsailab.com/2026/folder/post-id-7739?val](https://creatorsailab.com/2026/folder/post-id-7739?val) - Good URL Structure:
[creatorsailab.com/on-page-seo-checklist-for-adsense](https://creatorsailab.com/on-page-seo-checklist-for-adsense)
Before you hit the publish button, go to your document sidebar settings and trim your URL slug. Clean out tiny filler words, separate each phrase with a standard hyphen, and ensure your primary keyword sits inside the string.
Implement Strategic Internal and External Linking
A brand new article floating completely by itself looks isolated to search engines. To pass the standard how to optimize content for adsense audit, you must weave your pages together using hyperlinks.
Internal Linking (Your Own Library)
Whenever you draft a new post, link back to your previous live articles. This passes immediate indexing power across your site setup.
For instance, if your new pages are struggling to appear in search results, use our guide on how to fix the discovered currently not indexed error to clear the block.
External Linking (Authority Trust)
Do not be afraid to link out to trusted reference sources like official search journals or web document networks. This simple step shows human evaluators that you back up your facts with deep research.
Read the official Google AdSense Program Policies page to make sure your site stays fully compliant.
Avoid the Deadly Content Sins That Trigger Rejection
To protect your site from sudden monetisation blocks or quality flags, stay completely away from these common publishing traps:
- Keyword Stuffing: Never repeat your focus phrase twenty times in a robotic way just to try and trick the bot. Write naturally.
- Scraped or Raw AI Logs: If you use software assistants to generate initial outlines, you must surgically rewrite the robotic phrasing. Injecting your personal point of view is what separates premium publishing from spam.
- Dead Ends (404 Blocks): Always check your outgoing links. If an AdSense reviewer clicks a link on your site and hits a broken page, it signals bad site health.
If you want to review your current automation setup, look at our list of the best ai tools for content creators to balance speed and quality.
Final Verdict & Next Steps
Getting your website approved for monetization does not have to be a stressful waiting game. By spending an extra ten minutes before publishing to format your text lines, refine your headings, and clear out empty robotic phrasing, you turn your blog into a premium asset.
Stay consistent with your layout routine, clean up your mobile view, and let your traffic scale naturally!
FAQs Related to On-page SEO checklist for AdSense
1: Does on-page SEO really affect AdSense approval?
Yes! AdSense reviewers want to see high-quality, professional websites. A clean SEO structure proves that your blog provides a great user experience.
2: What is the biggest reason for “Low-Value Content” rejection?
The most common cause is publishing massive walls of text that copy generic information without adding any unique charts, tables, or personal advice.
3: How many posts do I need before applying for AdSense?
There is no official number, but publishing 15 to 20 well-optimized, clean articles that follow this on-page layout is usually perfect for quick approval.